

Get More From Your ShotKam: Field-Tested Tips & Tricks
In this guide, we’ll share field-tested tips and tricks that make a big difference: faster mounting, cleaner footage, and smarter setup for both hunts and the clay range.
Mounting Hack: Using the Allen Driver
We recommend attaching your ShotKam a minimum of 3 inches from the muzzle of the gun to prevent debris from spent shells from reaching the lens, but as far down the barrel as you prefer for balance and gun handling. There comes a point where the farther back toward the forend you mount the camera, the higher the chance of seeing the barrel in your videos. However, a quick tip to make mounting more efficient is to use the supplied Allen driver as a reference point.

Loosen the screws on the ShotKam mount and place it over the barrel. As a quick reference, hold the plastic part of the Allen driver against the lens of the ShotKam and place the tip of the Allen driver at the muzzle of the gun. Once in place, tighten the mount screws securely, ensuring that the camera is positioned directly below the barrel. Using the Allen driver as a reference should position the ShotKam roughly 5 inches from the muzzle and help prevent the barrel from appearing in your footage.
Mounting the ShotKam in a consistent position should also reduce the amount of calibrating needed between outings, including when switching guns. Although we always recommend checking your reticle calibration before heading into the field to ensure you capture accurate footage.
Pro Tip: The Allen driver supplied with each ShotKam can be used to gauge different lengths. The overall length of the driver is 5 inches, the length of the metal section is 4 inches, and the length of the shorter section is 3 inches.
Bench Reticle Calibration
Once the ShotKam is attached to the gun, it’s time to check and/or calibrate the reticle alignment.
One of the main ways we recommend calibrating the reticle is by placing the unloaded firearm on a bench or stable platform with the help of a rest or bag to hold the gun in place. Simply look down the rib and aim the bead at a target around 30 meters away (an object such as a clay trap, sign, or specific tree branch), connect the ShotKam to the app, and follow the steps to calibrate the reticle. Once the reticle is aligned with the target, confirm this within the app by tapping save.

This is our recommended method, as it is quick and easy, but it does require a stable platform and a rest for the gun.
Pro Tip: Keep the gun as steady as possible to ensure you can calibrate the ShotKam reticle efficiently and accurately.
“Buddy System” Calibration
Sometimes you may not have access to a bench to calibrate your ShotKam, but you may have access to a friend. This can be a very efficient way to calibrate and can be done quickly.

Calibrating with a friend involves picking a mutual target and, while you point at the target with an unloaded gun, your friend adjusts the reticle using the app on a phone. Once your friend believes the gun is aligned, you can use the delay in the app’s Wi-Fi to point at the target and then check the screen on the phone to confirm it is correct.
One of the best things about this method is that it is fast and requires no additional equipment, making it a perfect technique for hunters in the field.
Pro Tip: Have your friend hold the phone next to the barrel when you confirm the calibration. This allows you to keep the gun on target and move your eye only slightly off the bead to check the screen.
“Lone Ranger” Calibration
This final method allows you to calibrate your ShotKam independently – no bench, rest, or partner required. It’s ideal for when in the field and can be performed almost anywhere with just your phone.

The “Lone Ranger” method is similar to the “Buddy System,” with the difference being that you perform both parts (aiming and operating the app). Connect your phone to the ShotKam using the built-in Wi-Fi and open the calibration section of the app. Ideally, rest the phone against something so you can see the screen, point at the target, and use the Wi-Fi delay to check where the reticle is positioned compared to the target. Dismount the gun, adjust the reticle in the appropriate direction, and repeat the process until fully calibrated.
If you aren’t able to rest the phone within view, another technique is to hold the phone in the hand that would normally hold the forend and place the gun in the crook of that arm when you mount it. This allows you to see both the screen and the target. Once again, dismount, make the adjustment, and repeat the process until calibrated. It may feel awkward at first, but it becomes easier with practice and can be performed almost anywhere without assistance. Resting your phone hand against a solid object can improve stability and speed up the process if one is available.
Surprisingly, the “Buddy System” and “Lone Ranger” methods can sometimes be more accurate ways to calibrate the ShotKam because you are fully mounting the gun with the correct head position for shooting, rather than trying to line up the gun with a target while it rests on a bag.
Pro Tip: Aim precisely at the target and, once steady for a few seconds, deliberately drop the muzzle downward. This will highlight in the video where the bead was, making it easier to see how much adjustment is needed. This is especially useful when aiming freehand, as it reduces confusion caused by muzzle sway.
External Battery Tips
For long or multiple days in the field, an external power bank can be a perfect way to stay charged. The ShotKam can be charged using any standard USB power bank with the included charging cable. This allows you to recharge between sessions when a wall outlet is not available.

Be aware that the ShotKam automatically powers off while charging, so you cannot record videos and charge at the same time.
Another advantage of a power bank is the ability to charge a ShotKam in areas without access to a wall outlet, including inside a gun cabinet. If you want to charge your ShotKam while leaving it mounted to a gun inside a locked cabinet, a power bank can be the perfect solution.
Pro Tip: Advances in external batteries make them a convenient addition to any gear bag to keep phones, ShotKams, and other devices powered throughout the day. They can be a real lifesaver if you forget to charge between outings.
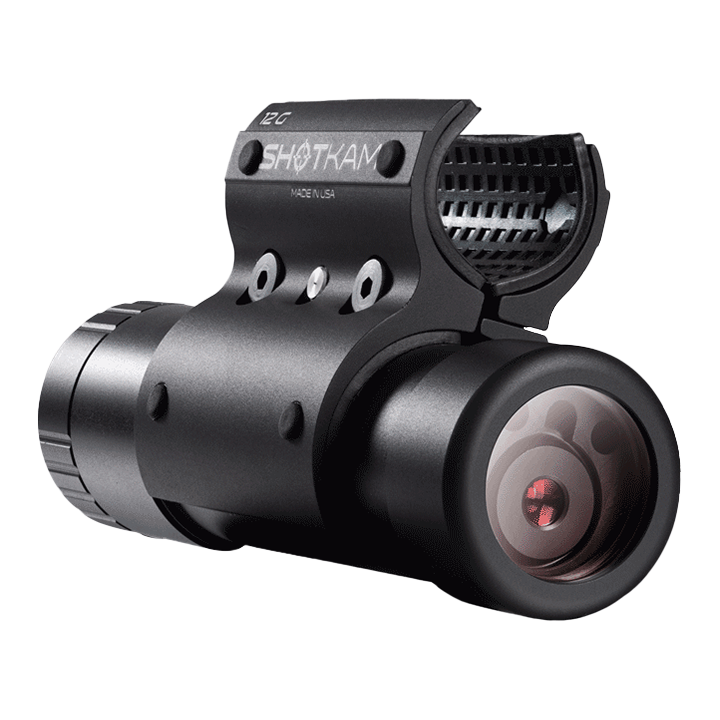
Protect Your Lens: Flip-Up Scope Cover Hack
The ShotKam lens is made from aircraft-grade glass, making it very durable for whatever a day in the field may bring. However, keeping the glass clear of debris, water, and even dew can be difficult in challenging conditions, which can impact video quality.

Members of the ShotKam Community Facebook Group have discovered that flip-up rifle scope covers can be a great addition for those who really put their camera through its paces. The Butler Creek Flip Open Scope Mount is a high-quality option we recommend because it fits well on the ShotKam and offers durable protection.
For the ShotKam Gen 4, you will need the 31mm (OBJ Size 2) cover.
Flip-up scope covers are ideal in the field because they remain attached to the ShotKam, keeping the elements away from the lens. The cover can be flipped up when birds start working the decoys or when you step into a clay station. They are also useful for keeping dust off the lens if you leave the ShotKam mounted on the gun while stored in a cabinet.
Pro Tip: Don’t forget to flip it open when birds are working. Unlike a traditional scope, you may not immediately notice the cover is still closed. Make it a habit so you don’t miss any videos in the field.
Final Thoughts
We hope you find some useful tips in this blog. We would love to hear if you have any specific tips and tricks that help you get the most out of your ShotKam in the field. Be sure to tag us in your posts on social media!
You are reading: